Custom Domain Setup Guide
There are two ways to set up your branded domain with Linko, depending on your DNS provider:
-
Using Cloudflare → Follow Guide A: Custom Domain with Cloudflare
-
Using other DNS providers (GoDaddy, Namecheap, Google Domains, etc.) → Follow Guide B: Custom Domain without Cloudflare
Guide A: Custom Domain with Cloudflare
If you’re already using Cloudflare or prefer their DNS management, follow this guide.
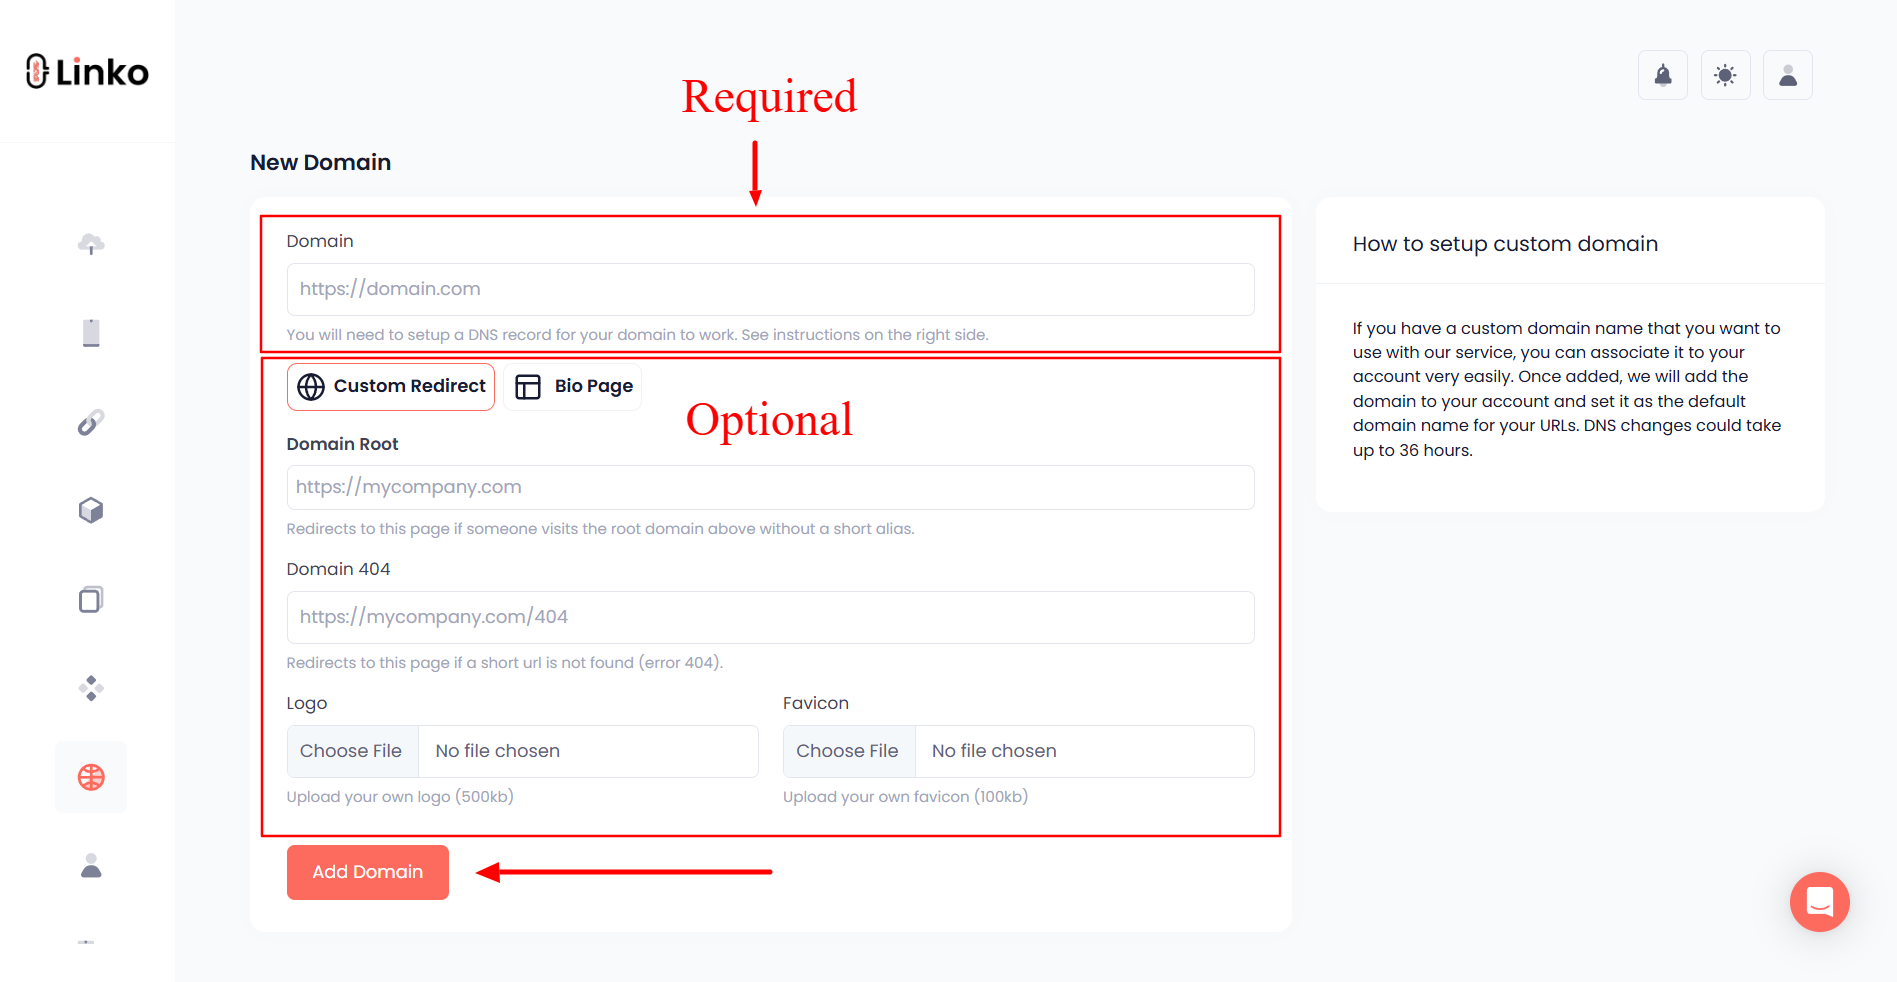
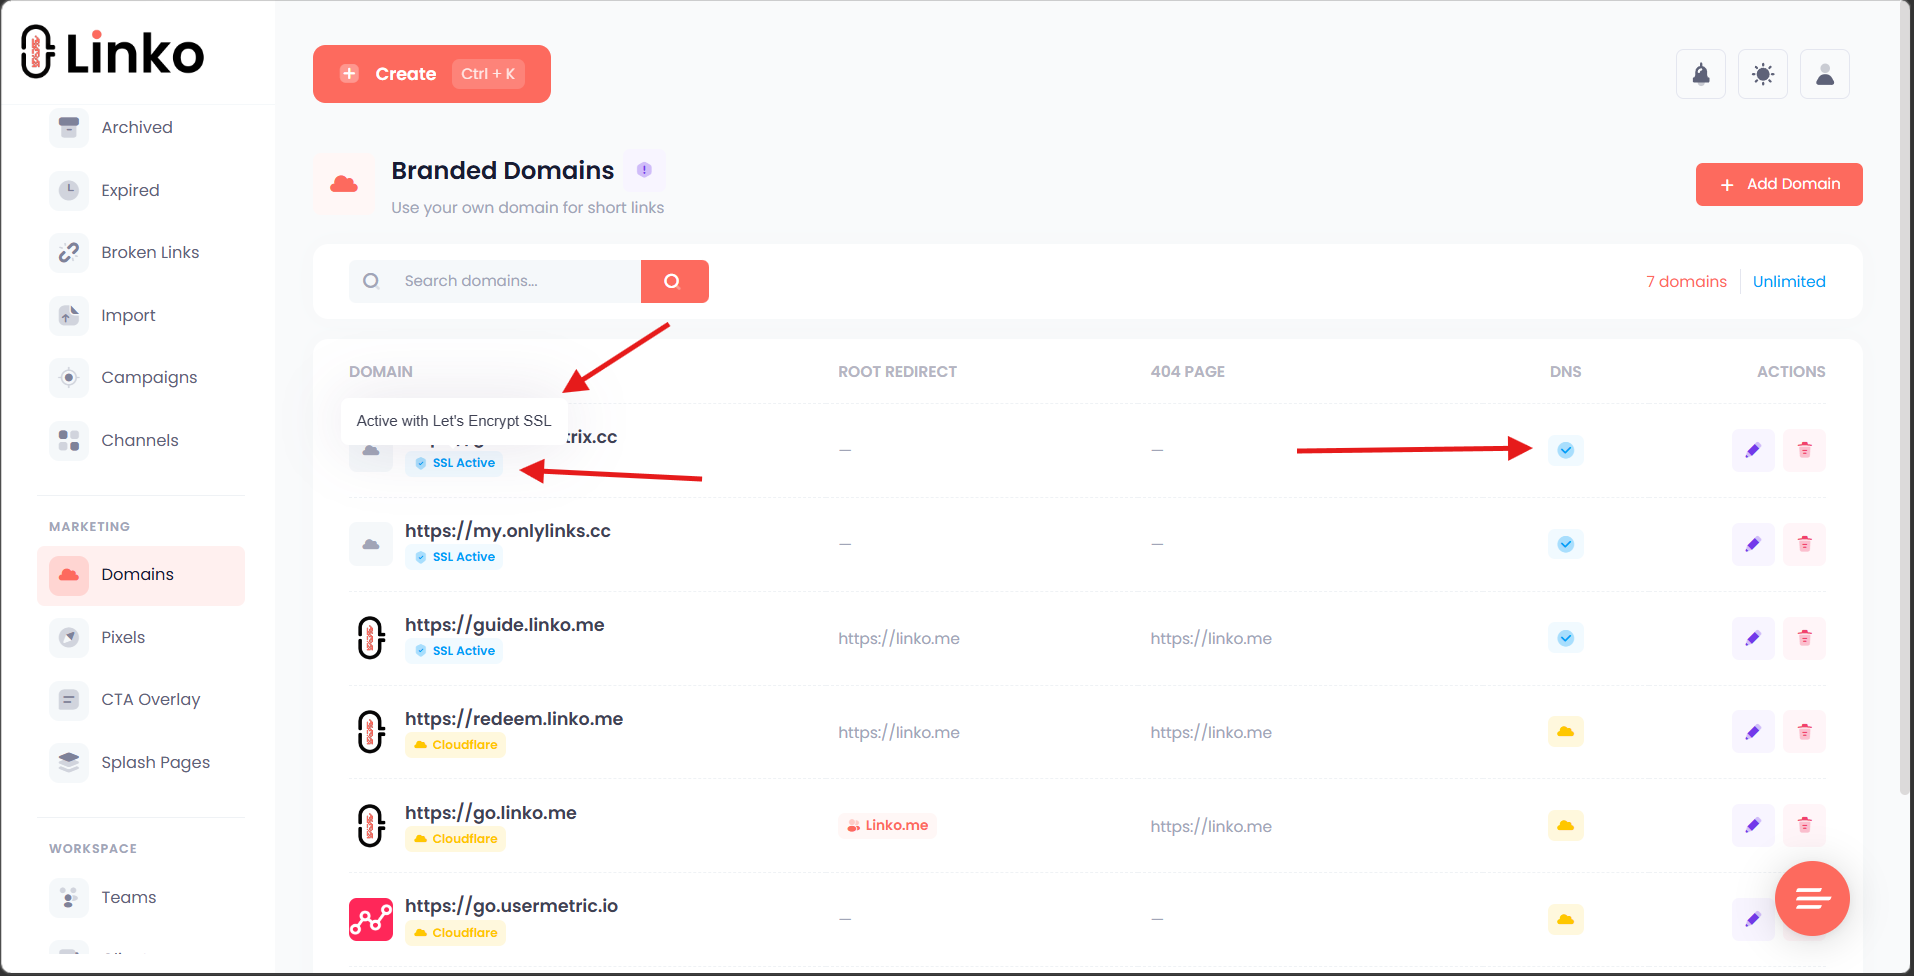
Step 1: Add Your Domain to Linko
-
Log in to your Linko account.
-
Go to the Domains section.
-
Click Add Domain.
-
Enter your branded domain.
-
(Optional) Set up Domain Root and Domain 404 for better visitor handling.

Step 2: Configure DNS in Cloudflare
For a Root Domain (yourbrand.com)
-
Go to your Cloudflare DNS settings.
-
Create a CNAME record:
-
Name:
@or your root domain -
Target:
linko.me -
Proxy status: Proxied (orange cloud)
-
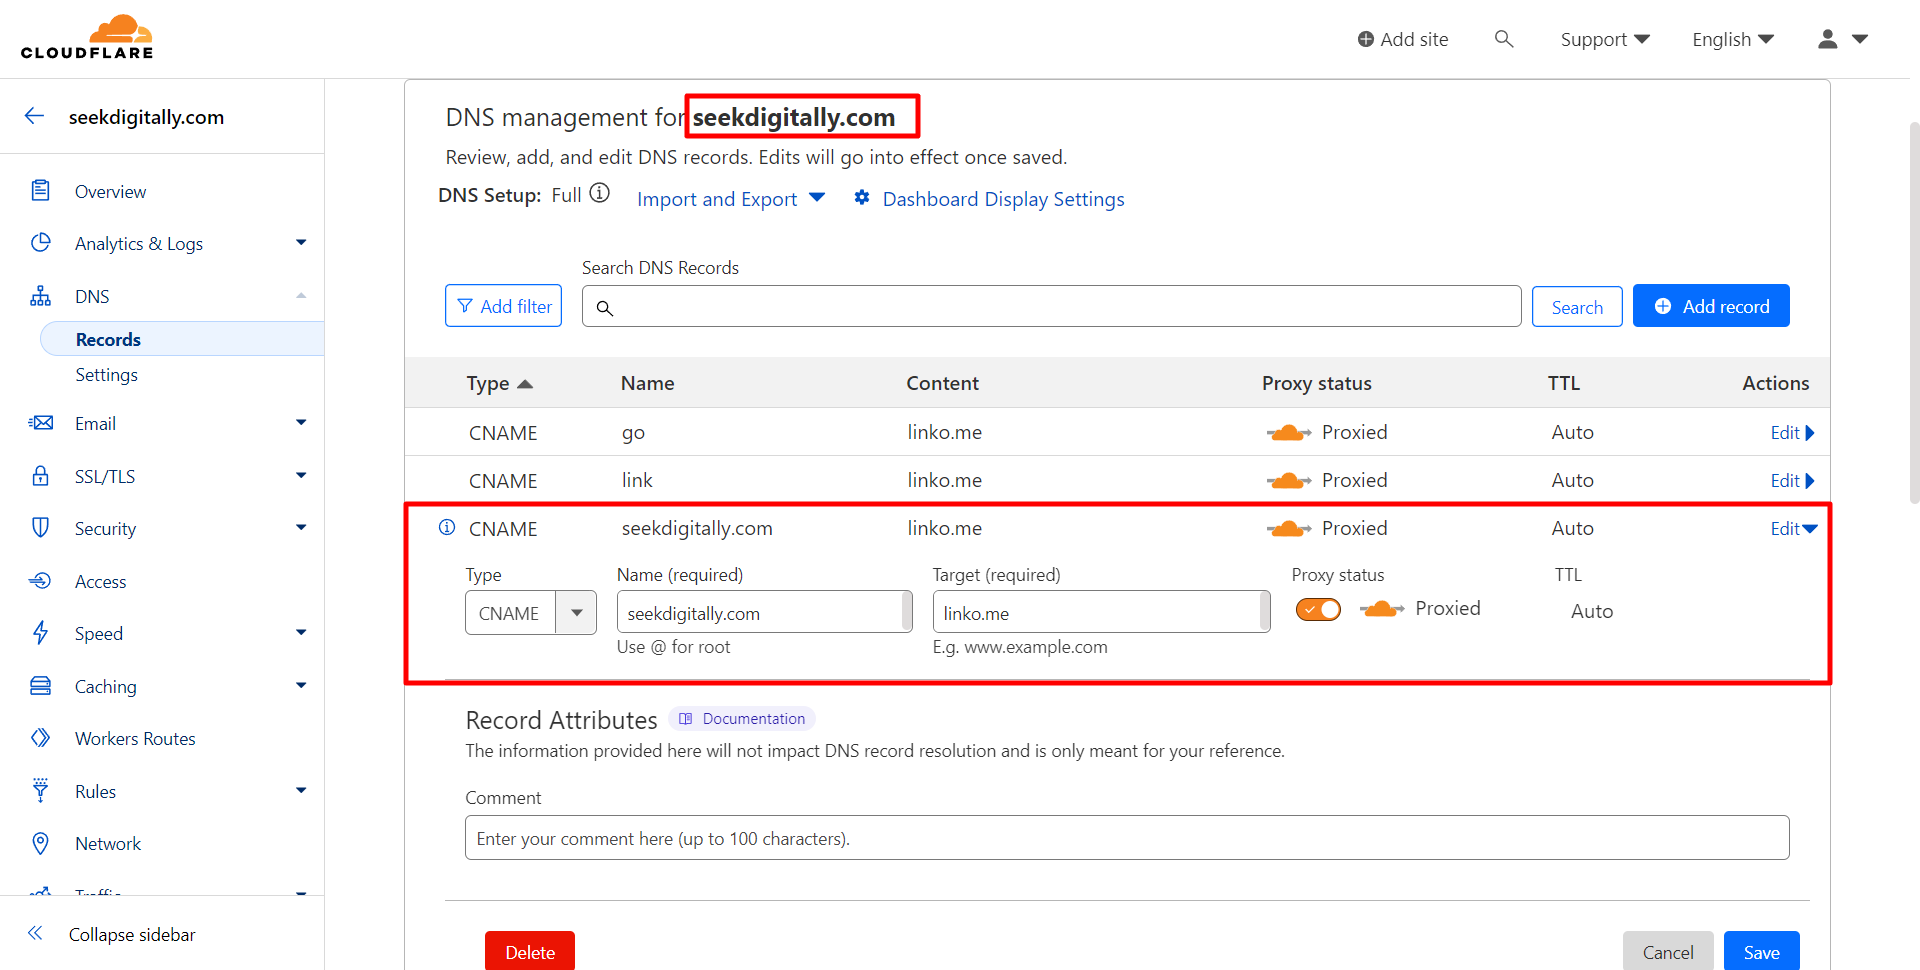
Important: Do not create an A record with the same host as your CNAME. This causes DNS conflicts and your short links won’t work.
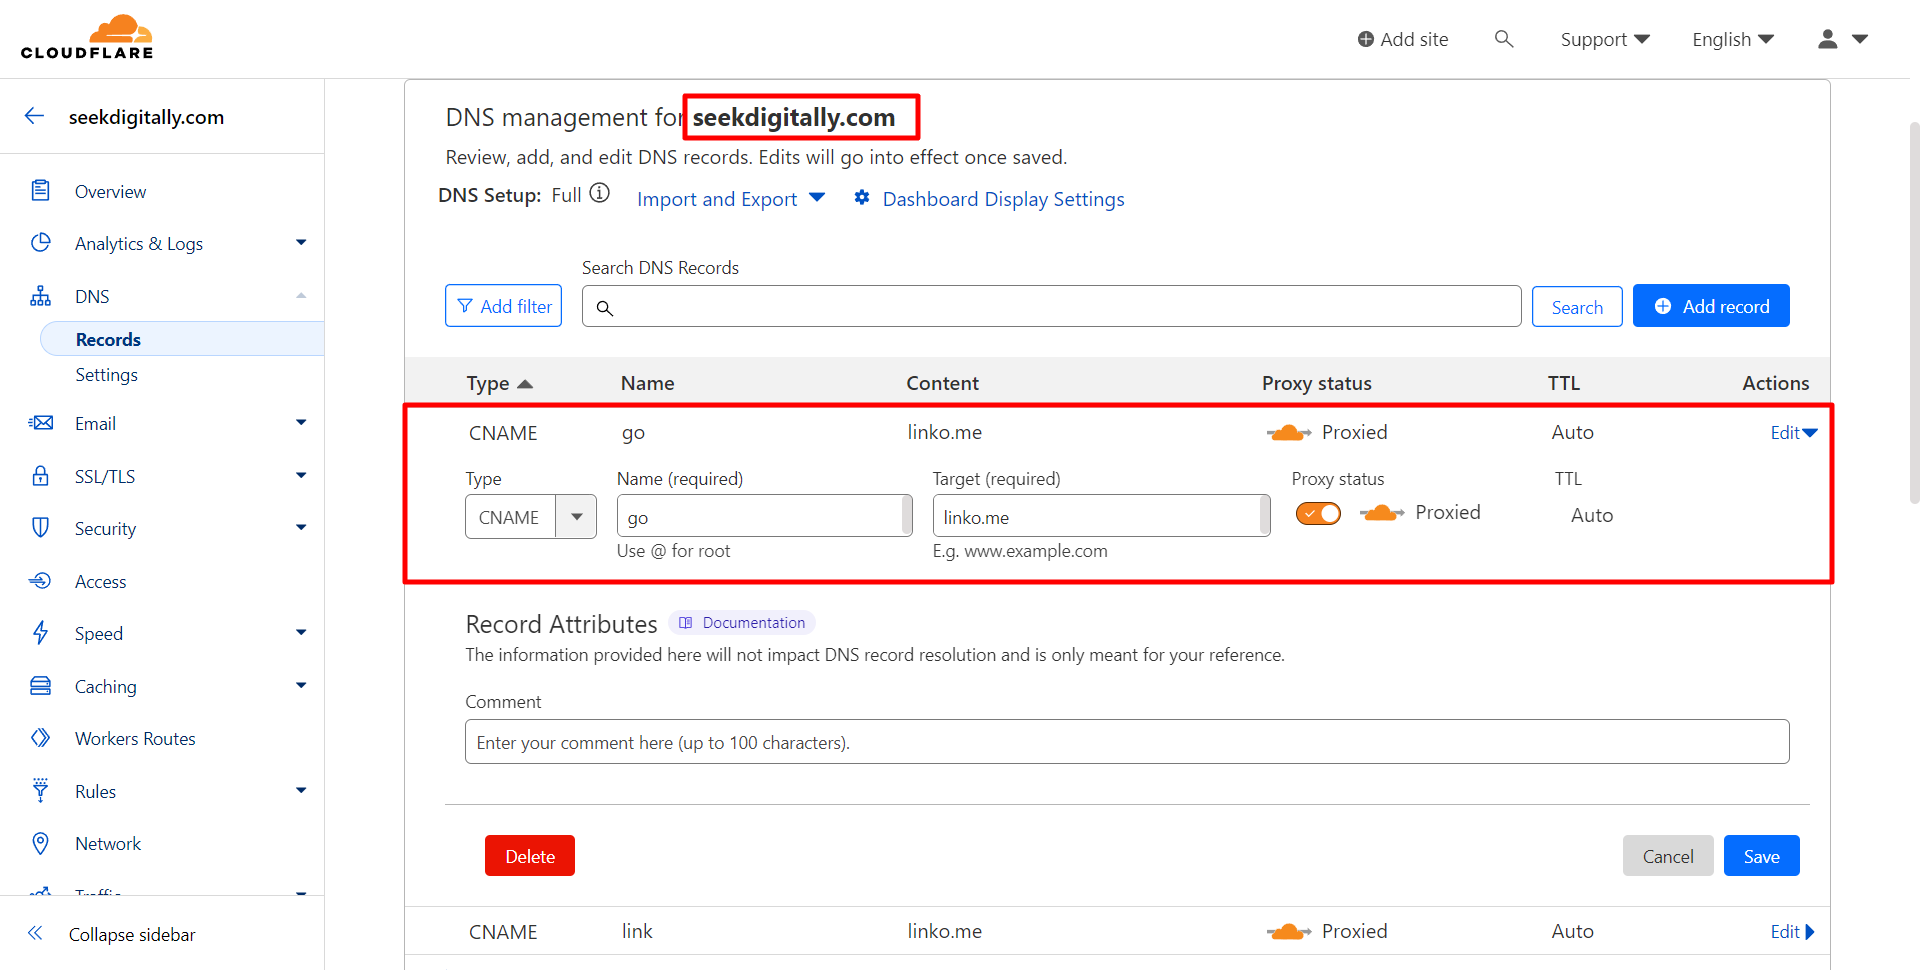
For a Subdomain (go.yourbrand.com)
-
Go to your Cloudflare DNS settings.
-
Create a CNAME record:
-
Name:
go,link, orout -
Target:
linko.me -
Proxy status: Proxied (orange cloud)
-
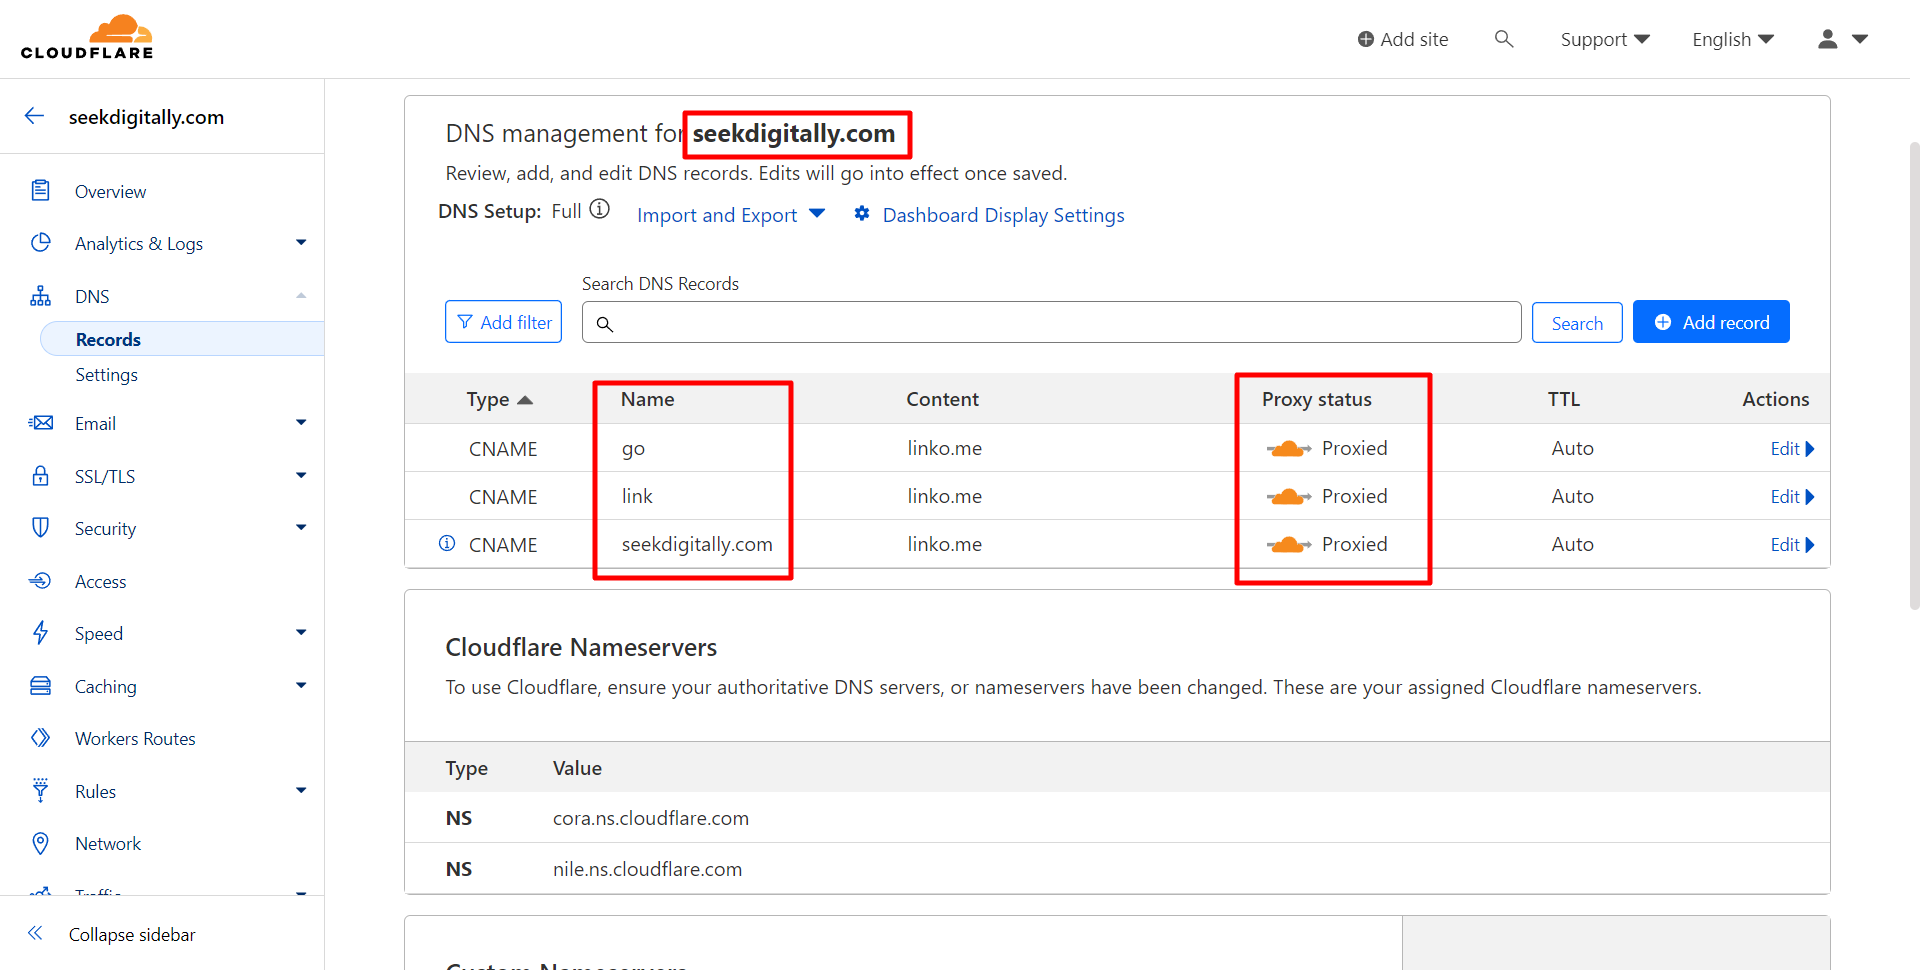
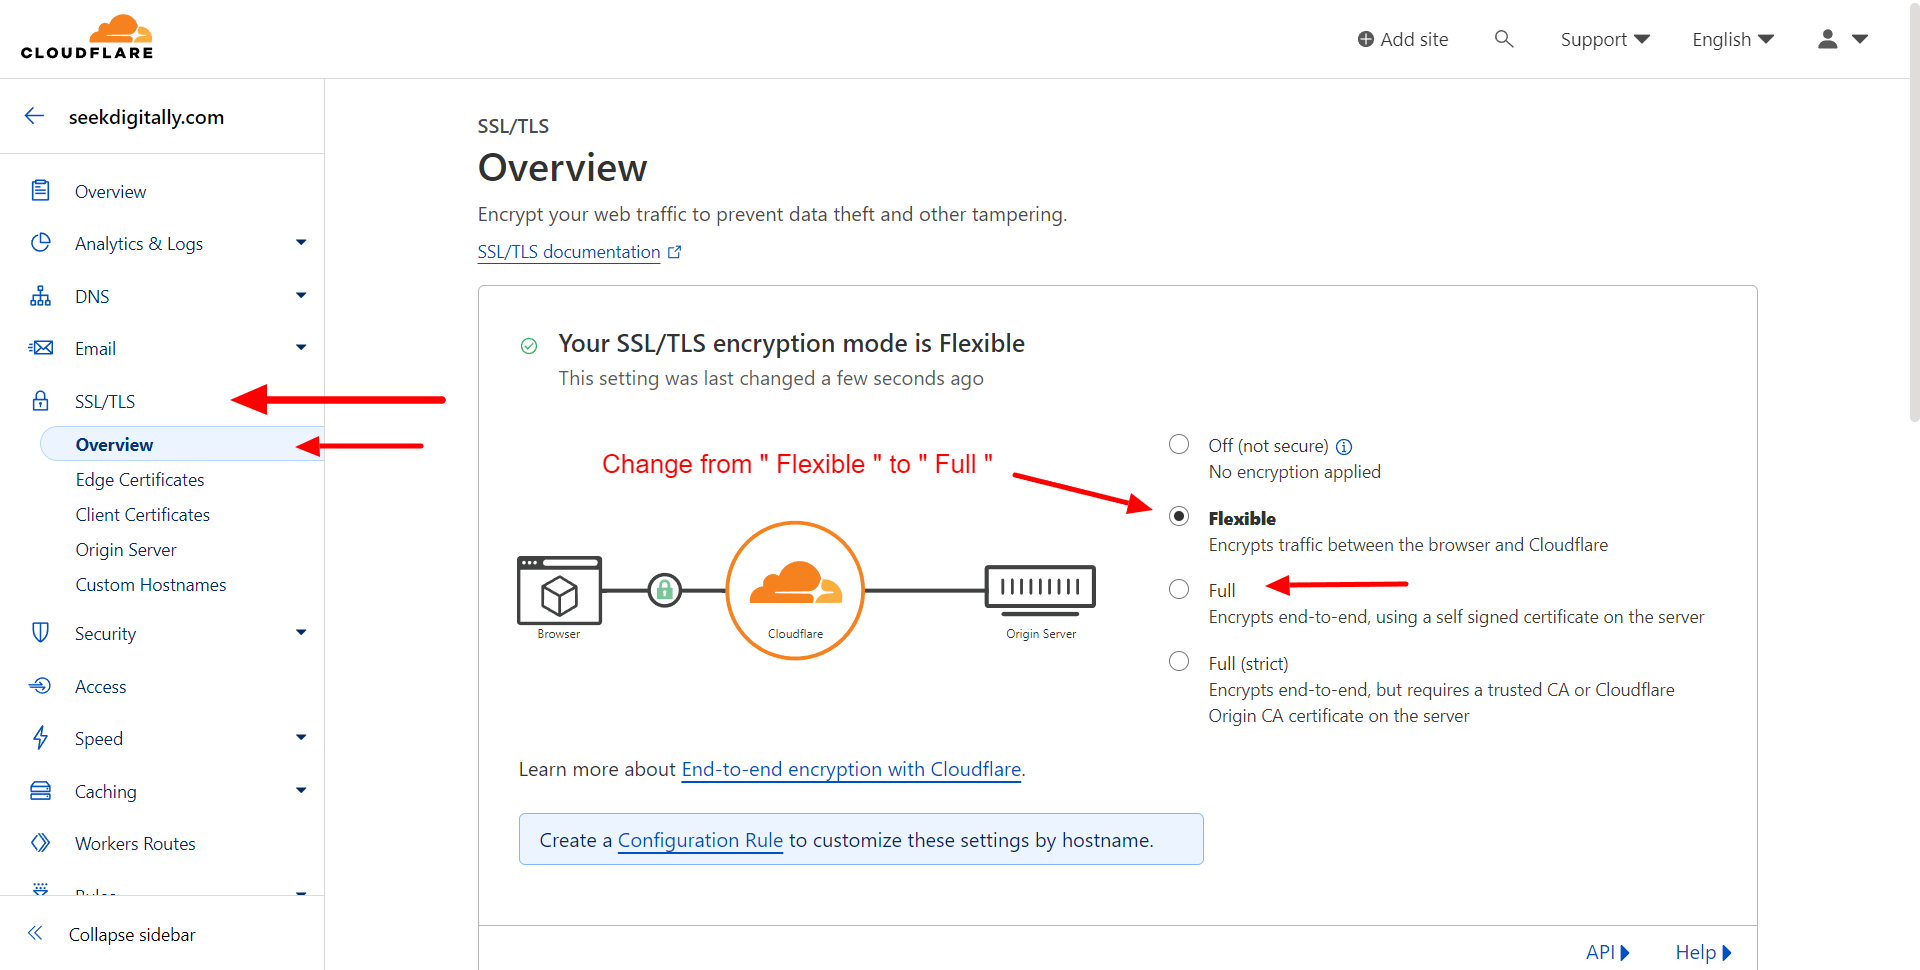
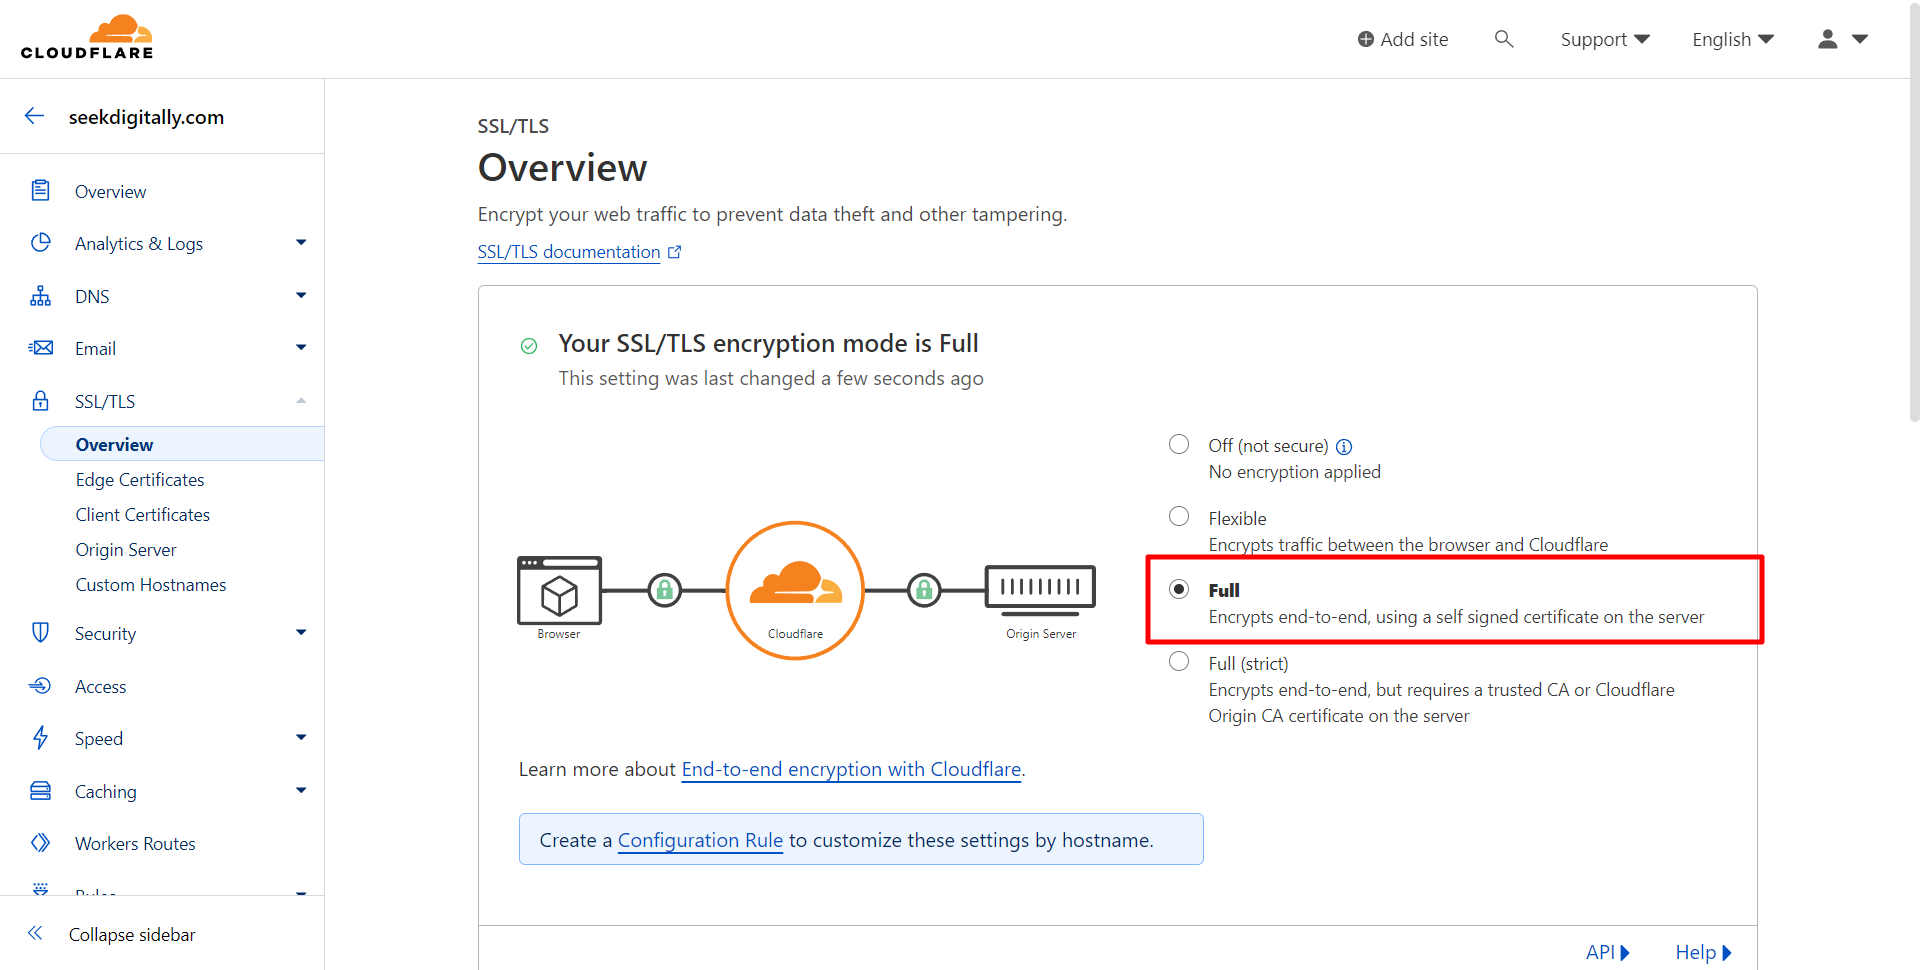
Step 3: Configure SSL in Cloudflare
-
Ensure proxy status is Proxied (orange cloud).
-
Go to SSL/TLS > Overview.
-
Change encryption mode from Flexible to Full.
Helpful Cloudflare Links
Guide B: Custom Domain without Cloudflare
If you use GoDaddy, Namecheap, Google Domains, Porkbun, Hover, or any other DNS provider, follow this guide.
Linko automatically provisions SSL certificates for your domain.
Step 1: Add Your Domain to Linko
-
Log in to your Linko account.
-
Go to the Domains section.
-
Click Add Domain.
-
Enter your branded domain.
-
(Optional) Set up Domain Root and Domain 404 for better visitor handling.
Step 2: Configure DNS at Your Provider
For a Root Domain (yourbrand.com)
-
Log in to your domain registrar (GoDaddy, Namecheap, etc.).
-
Go to DNS settings.
-
Create a CNAME record:
-
Host/Name:
@or leave blank (depends on provider) -
Value/Points to:
linko.me -
TTL: Auto or 3600
-
For a Subdomain (go.yourbrand.com)
-
Log in to your domain registrar.
-
Go to DNS settings.
-
Create a CNAME record:
-
Host/Name:
go,link, orout -
Value/Points to:
linko.me -
TTL: Auto or 3600
-
Step 3: Wait for SSL Provisioning
Linko automatically provisions an SSL certificate for your domain once DNS propagates. This typically takes:
-
DNS propagation: 5 minutes to 48 hours
-
SSL provisioning: Automatic after DNS is verified
Check your domain status in Linko’s domain settings. Once it shows Active, your domain is ready.
Glossary
What is a branded domain?
A custom web address (like yourbrand.com) that replaces the default linko.me domain. Branded domains build trust and reinforce your brand with every link shared.
What is Domain Root?
The page visitors see when they visit your domain directly (e.g., yourbrand.com without a short alias). Set this to redirect to your homepage or any page you choose.
What is Domain 404?
The error page shown when someone visits a short URL that doesn’t exist. Customize this to display a branded message or redirect users to a useful page.
What are Logo and Favicon options?
You can customize your short links and client portals with your brand’s logo and favicon: